How can we help?
Create and share action views
1- Definition of an action view
An action view is a grouping of actions according to search criteria. This view will search for actions scattered across different folders and present them in a list, allowing them to be viewed at a glance without having to search for actions folder by folder.
2- Create an action view
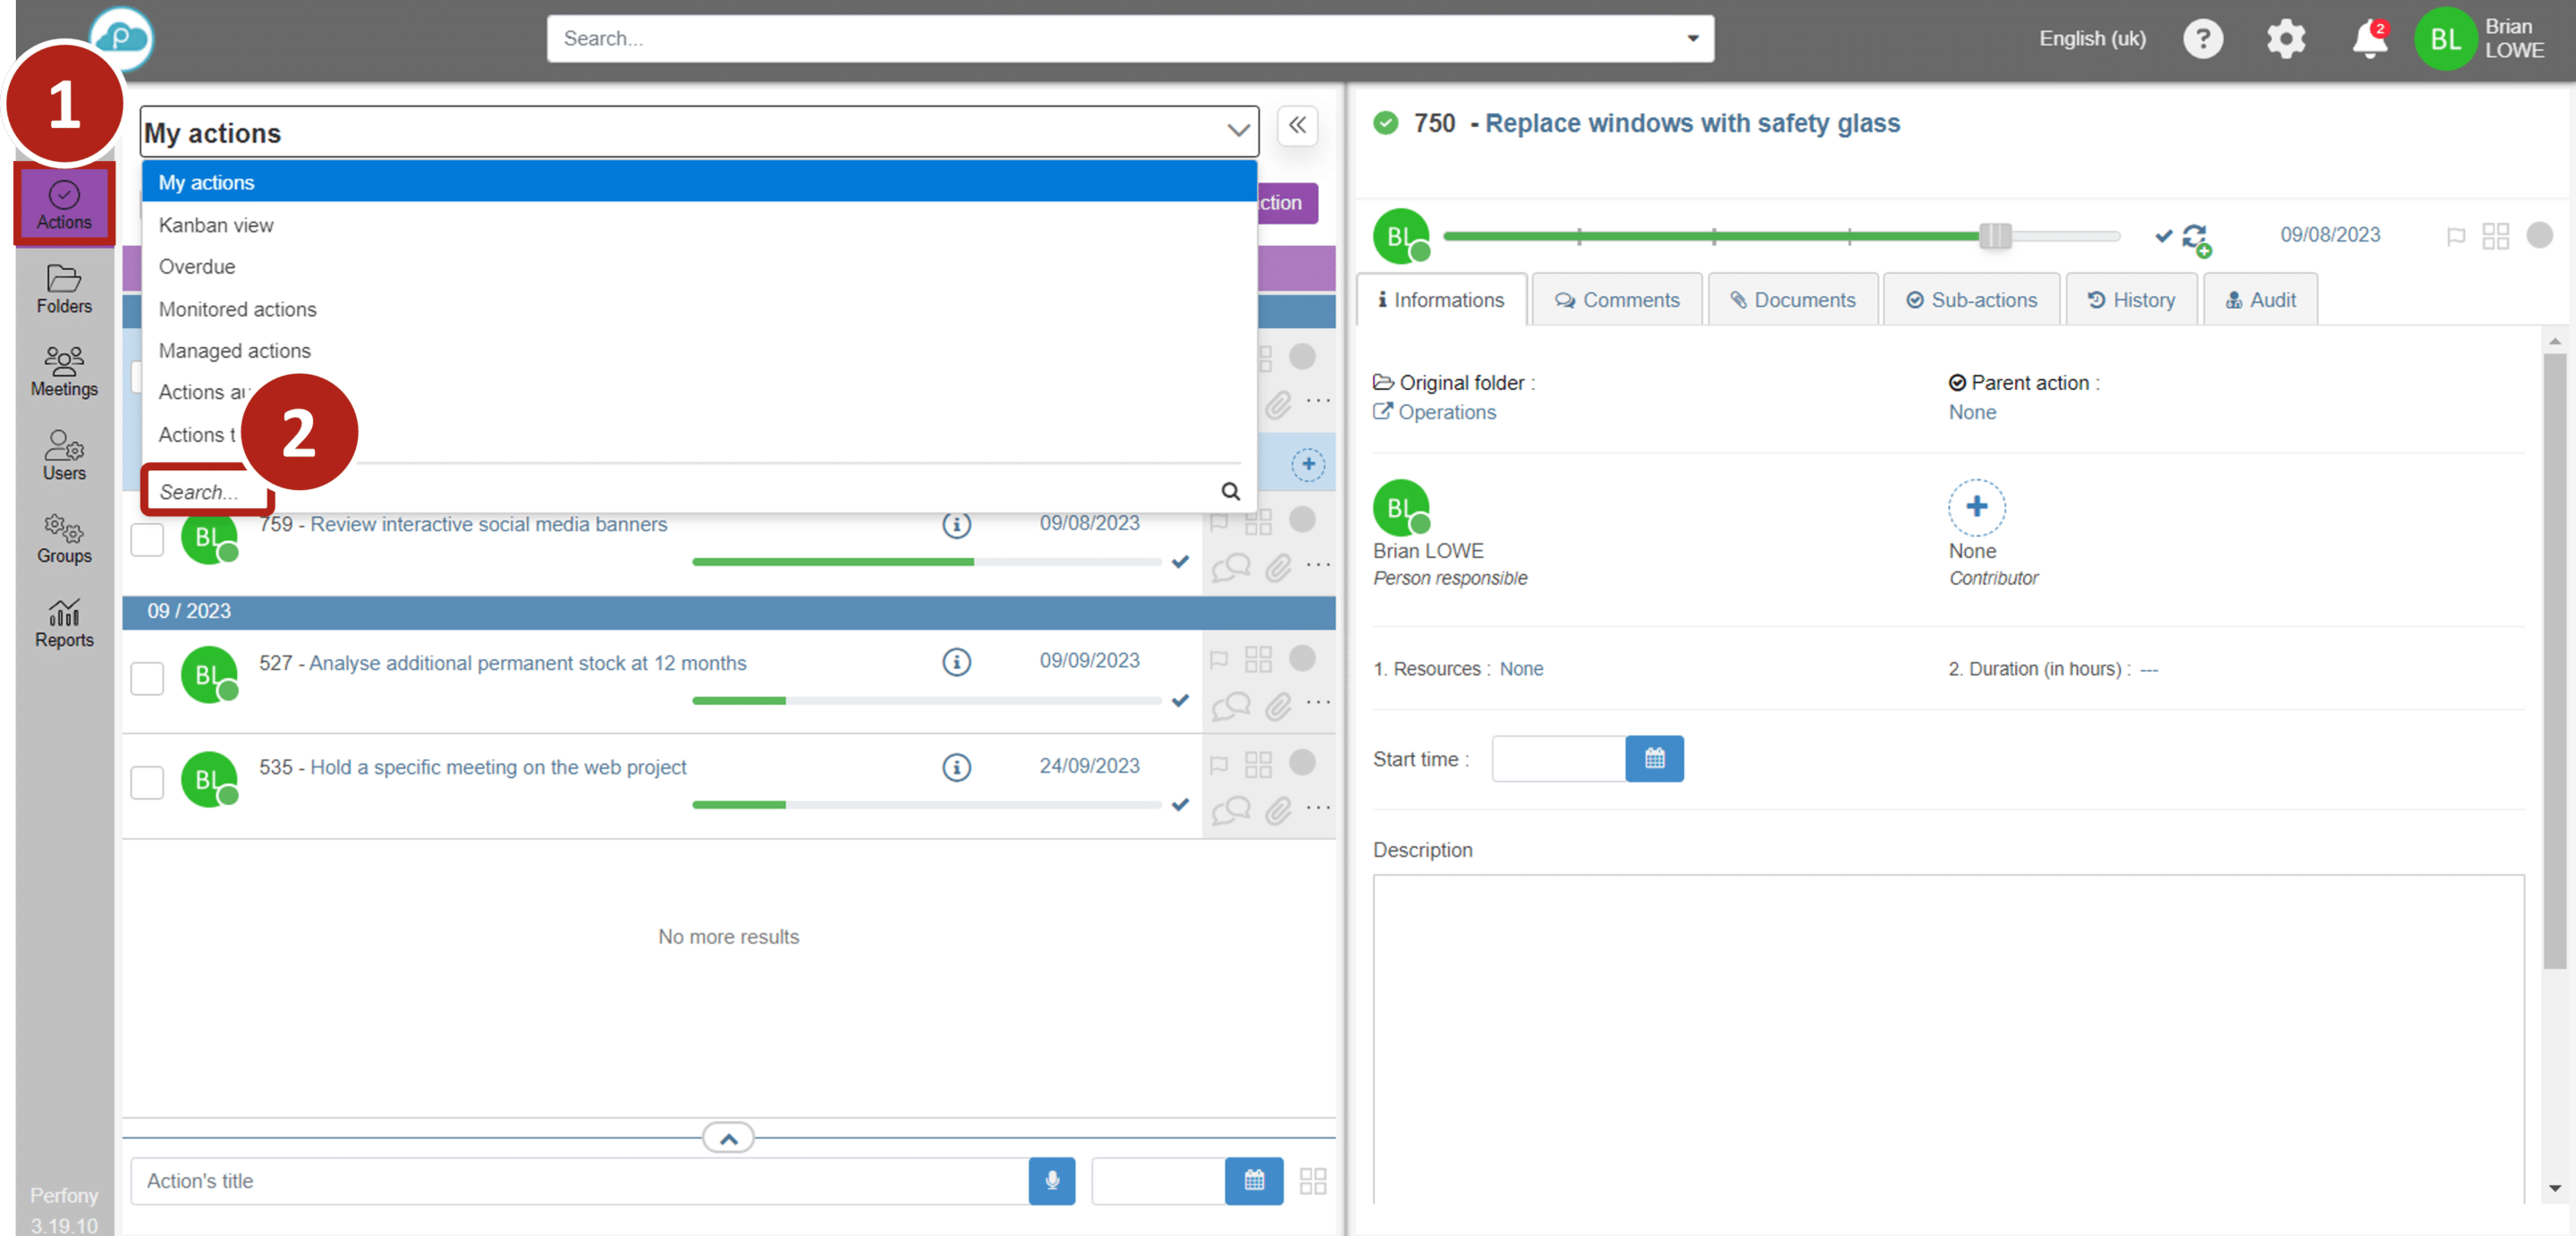
An action view is created using the advanced search module, which can be accessed from the “Actions” menu [] then, at the bottom of the drop-down menu, click on “Search” [] .
All the actions to which you have access (either because you are a file ‘driver’ or because you are responsible for and/or contribute to actions) appear.
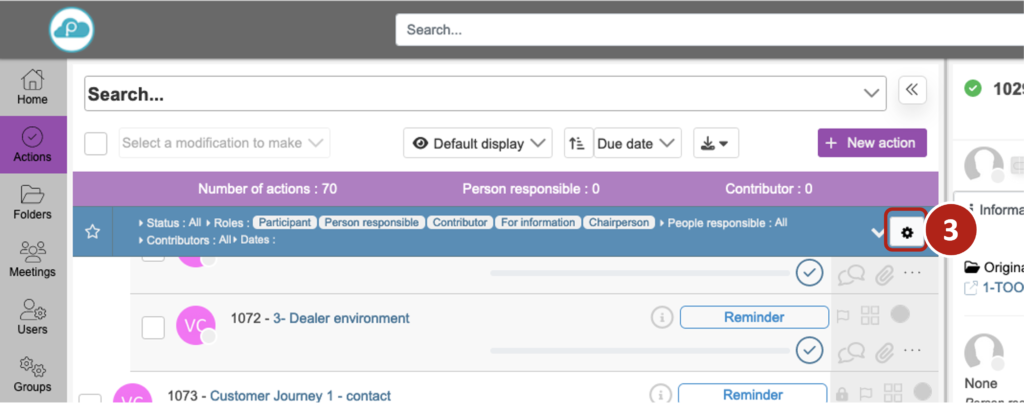
To build a view, we start by selecting the actions that will make up the view according to certain criteria.
Click on the configuration icon to the right of the blue banner as shown [] .
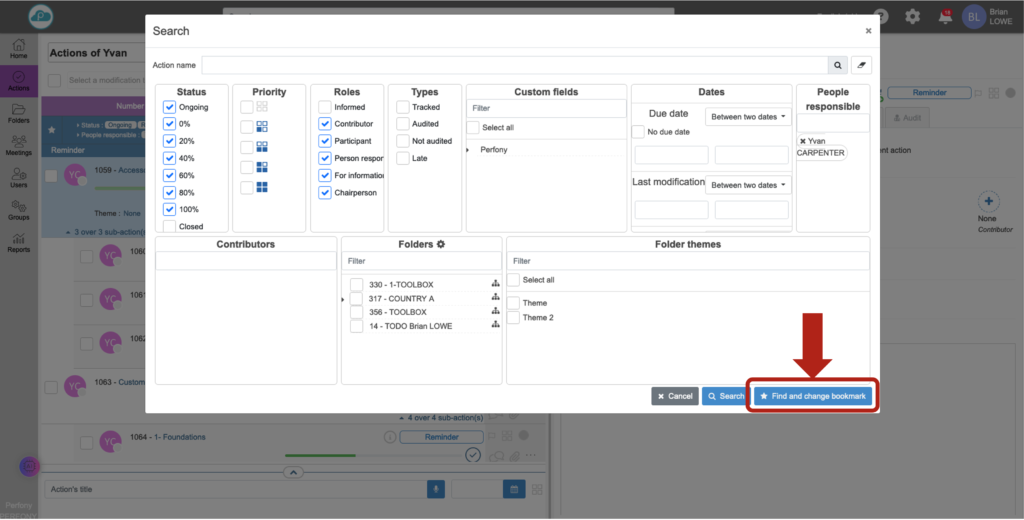
A popup window will open showing the different filter options.
Please note: when you repeat a search, the selection criteria are saved. So remember to delete the criteria by clicking on the eraser at the top right of the window [] .
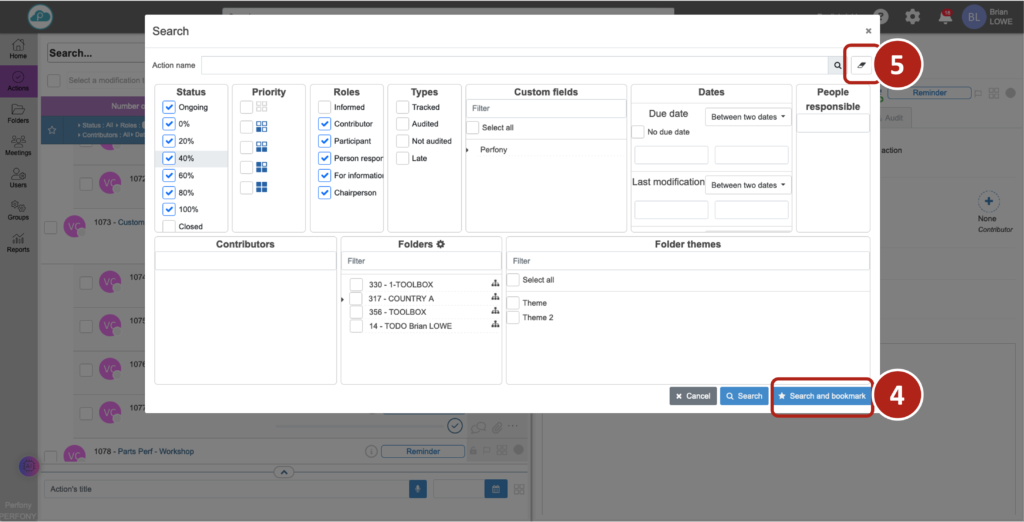
Once you have clicked validate, the actions corresponding to the search criteria will be displayed.
3- Save an action view
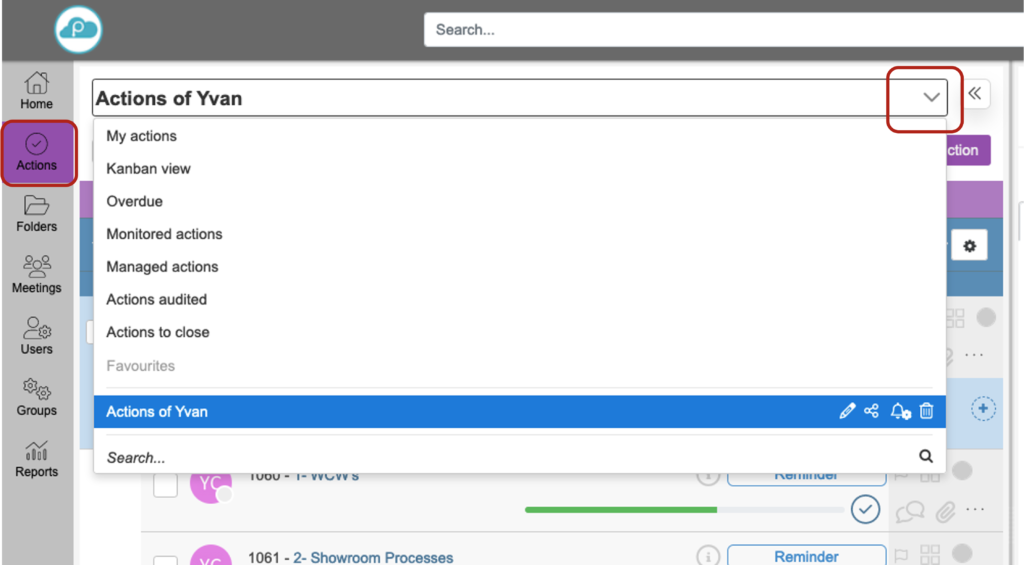
If you have clicked on “search and bookmark”, a popup will open asking you under which name you wish to save this list. Enter a name, validate and this list will then automatically appear in the list of views and can be found again at any time in the drop-down menu from the “Actions” menu.

4- Modifying an action view
You can change the name and selection criteria of your action view at any time.
Search the list of views (from the “Actions” menu) for the view you wish to modify.
To change the name: Click on the edit icon [] to the right of the view name.
To change the action selection criteria: click on the view, then click on the settings button [] (the same one used to make the first settings), make the changes, then click on “search and modify favourite”. Your view is updated with your new criteria.
5- Share a view
You can share the view you’ve created directly with other Perfony users. From a view, click on the share icon [] to the right of the view name. A popup window will open in which you can enter the first few letters of each name with which you want to share the view. Once validated, each user concerned will see this view in their list.
Please note: obviously, only the actions to which he has access will be visible to the user who has received the view share. In other words, if the user does not have access to the folders containing the actions, they will see nothing. Logically, this would be a breach of confidentiality.

You can also share this view by email, using the notification system below.
6- Setting up email notifications on an action view
For an action view, you can set up notifications to be sent by email. To do this, click on the notification icon to the right of the list name [].
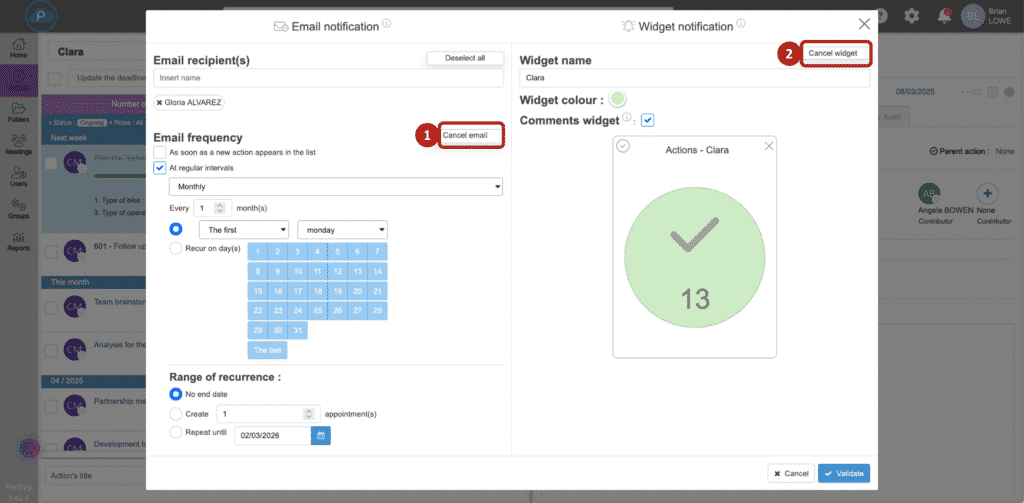
Un Popin s’ouvre divisé en 2 parties : à gauche les notifications par email, à droite la création d’un widget.
Please note: you can choose to be notified by email or by widget, but you are not obliged to have both. To do this, you need to click on “cancel email” [] or “cancel widget” [], whichever you prefer. Otherwise the validation button will not be active. You can always change these settings later.
Set your email alerts as you like. You can share these alerts and schedule them when a new action is added to the list and/or at regular intervals. Note that when a notification is activated, the icon changes to [].
To modify a notification, simply click on the icon from the list, make the changes and save.
7- Create a widget for an action view
Widgets are visual indicators that are visible from the home page. You can create one widget per action view. This widget will give you instant access to the number of actions in your action view, and will be a shortcut to access them. To create a widget, start from the notifications configuration pop-up and on the right-hand side, give the widget a name, choose a colour and click on confirm. Your widget will then appear in the list of widgets on your home page (See how to display a widget here).